

Install CorelDraw Graphics Suite X4 on Windows 10
When attempting to install CorelDraw X4 on a fresh copy of windows 10 I was greeted with the follow error message.

I immediately searched online for a solution and had no luck finding
one. I knew CorelDraw would run on Windows 10 because when I upgraded my
computer from Windows 7 to Windows 10 CorelDraw worked (except for a
menu color problem). I started playing around and was able to manually
install CorelDraw by copying files and registry settings from and
windows 7 install to Windows 10 computer. I found that to be a very
difficult process so I kept trying and eventually found an easier way to
install CorelDraw.
I have only tested this on two computers so let me know if this works for you.
Installing CorelDraw X4 on Windows 10 will break your start menu. See post #2 before starting.
Please use this guide at your own risk! Thank You
Install Process
Step 1: Copy the contents of your install DVD to a new folder on your computer.
Step 2: Browse to the “Setup” folder in the newly copied install files.
Step 3: Open Setup.XML with Notepad
Step 4: Change the highlighted line of code from “Setup.msi” to “Setup123.msi”
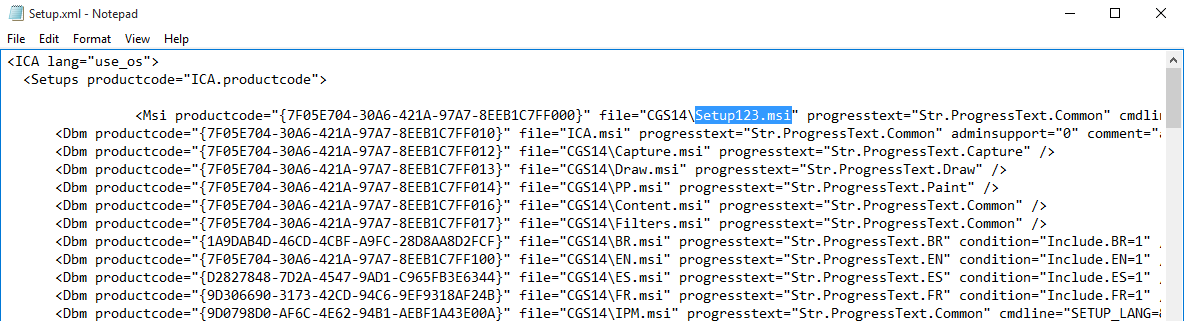
Step 5: Save and close the XML file.
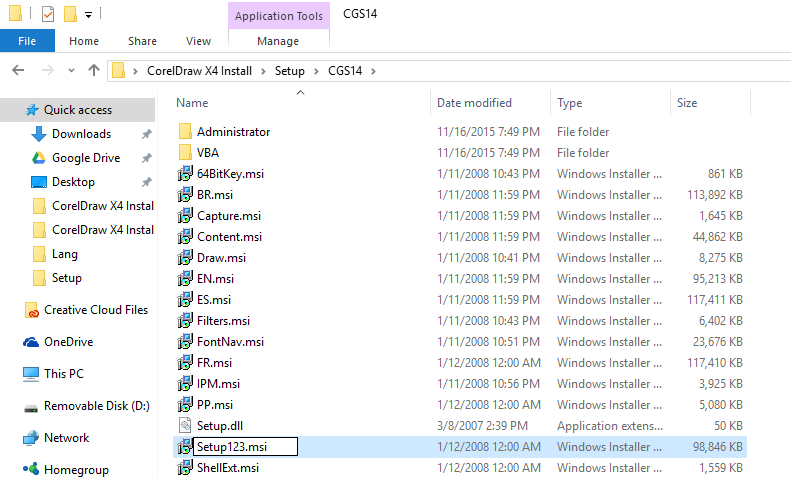
Step 6: Browse to the “CGS14” folder located inside the “Setup” directory and rename the “setup.msi” file to “setup123.msi”
Step 7: Go ahead a launch autorun.exe located in the root of your
copied install file. You should now be able to install CorelDraw
Graphics Suite X4 on your windows 10 computer.